Everyone loves to live in a home with high walls, elevated ceilings, and fences because it is always spacious and breathtaking.
However, it can be challenging to paint high places without a ladder. Even when you have a little ladder, or when the ladder in your possession is not as high as the height of your room, you won’t still be okay.
But do you know that you can still achieve your goals without a ladder?. The essence of this article is to reveal how to paint high places without a ladder.
How To Paint High Places Without a Ladder?
Most people like to use a ladder to reach unattainable high places when painting. But, there are some spaces that you can’t paint with a ladder. For instance, it is dangerous to use indoor ladders for high ceilings or to paint places like the staircase.
Hence, other equipment like rollers, texture terminators, scaffolds, extension poles, and others are necessary.
Tools and Materials You’ll Need
- Get yourself a roller
- Any amount of paint to be used
- A paint angle brush that has a threaded handle (preferably)
- Any small bucket or a tray
- Extender pole (select an adjustable screw-on type)
- Paint’s tape
- Primer (if need be)
- A lot of drop cloths
- A putty knife
- Spackling paste
Steps to Paint High Places without a Ladder
We understand that high ladders make you nervous, and you may be giving up the painting vibes, but chill; spend a few minutes reading this step-by-step guide on how to paint high places without a ladder, follow them carefully.
Step-1: Initial Preparation
Before you think of painting, get the necessary tools and materials. Then you can go ahead to clear your furniture and fittings, clothes, books, tables, or anything that will hinder your painting process.
Make sure that these items are well packed; you can also use tape to tie them up together. Also, protect the room lighting, railings; do this so they don’t get stained and messed up by the paint drips.
Use painter’s tape to demarcate the areas you will paint with a different color or where you can reach without a ladder.
Step-2: Get the painting materials
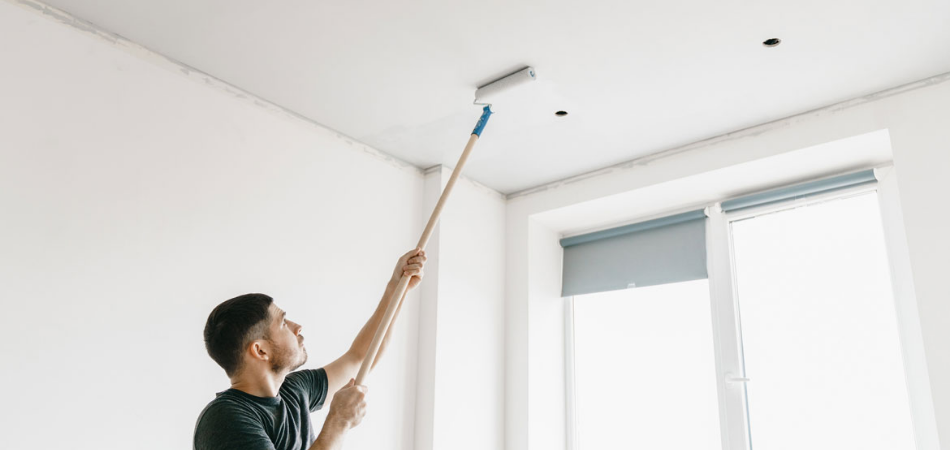
We know you will not make use of a ladder here, but you still have painting equipment to set up. So, you can now bring out your paint-angled cut brush and the extension pole (screw-on type), make sure it is long, extends high above the railing of the stairs, and reaches your ceiling.
This is comfortable and easy to use, but if you have not purchased the extension pole, you can rent it for the time being. But, ensure that it matches with the angled cut brush and the roller brush.
You can purchase the extension pole and angle cut brush at your local store that sells building materials. The seller of these building materials may likely show you the best-angled brush and extension pole, that’s if you ask them.
These items are important to paint the high wall near the ceiling; it is also necessary for the brush’s handle to be a threaded one.
This is to grant an easy connection to the extension pole. Then, grab the paint angled cut brush, attach it to the high extension pole, and pour your paint into the tray or little bucket.
Step-3: Fill up the holes and spots
Before you begin painting, check out for rough spots and holes. If you find them, it is good to patch them up to have a glamorous painting.
To do this, you need to bring out your putty knife and spackling paste. Use the spackling knife to scrape out the rough walls, and use the spackling paste to fill up the holes and spots on the wall.
If you’ve not used the spackling paste before, carefully read the instructions on the pack, so you will know how many minutes you will wait before you begin the painting process.
Step-4: Use the roller to prime the walls
Quality prime formulas provide good coverage and prepare the wall ahead for the painting process.
A wall primer looks like some paint, but its concentration is higher than that of paint. What it does is cover the surface and make it smooth for the paint to stick to it. It’s just like a piece of gum for paint.
However, you don’t make use of your wall primer always. It is only necessary when the wall surface you are dealing with is stained, dark, damaged, glossy, porous, or if it even has an odor. You can seek more information from your building material vendor.
Now, fix your paintbrush or roller to the extension pole. Remember that you’re making use of the extension pole in place of a ladder.
Then, apply the primer on the wall and let it get dried for some time. The user’s instruction on the can of the primer will inform you of how much time you may need to wait, but it is better to wait for the primer to dry thoroughly.
Step-5: Start painting
Now that you have done the above duly, you can finally begin your painting process.
Go ahead by pouring little paint in a bowl, tray, or bucket, and paint the corners/borders between the walls and ceiling. Ensure that you’re not using a completely different color to paint the wall and ceiling.
The reason is that in case the painting becomes a little bit rough, it won’t be obvious. But if you decide to use a completely different color, then you have to be extremely careful while painting, so it doesn’t end up embarrassing you.
Otherwise, you can buy the shur-line 2006559 edges cleaner product. The edge cleaner will ensure that the other side of the wall won’t receive paint drips and imperfections.
Note: Do not pack too much paint on your brush so it does not mess up the floor.
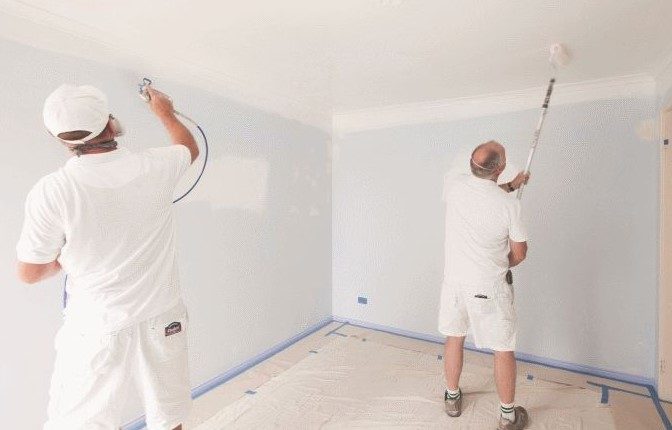
Continue by painting the main walls with the extender pole attached to the roller. Carefully roll it up and down in a way that it blends.
Afterward, you can move to the corners of your wall. Here, fix the extension pole and angle cut brush to each other, and make sure the color blends well. You can change the brush to the normal paintbrush if you want to paint the low corners of the wall.
Safety Tips to Keep In Mind While Painting High Places Without a Ladder
Here are some safety tips you should follow while using a ladder to paint high ceilings and walls.
Do Not Breath In the Chemicals
Be careful not to breathe in chemicals from paints. Some paints contain organic compounds while others don’t. If possible, always go for paints that don’t have any fumes that are not harmful to the body.
Also, ventilate the room you are about to paint by opening all doors, windows and turning on the fans or air conditioner. Caution children to stay away from the painted area.
Take Safety Measures
Make use of safety tools. Always take advantage of precautionary tools when painting. For instance, when scraping, wear safety gloves, a mask, and safety goggles.
In addition, if you will make use of paints containing harsh chemicals, always wear a medically approved respirator, safety goggles, and rubber gloves.
Prevent Accidents
Be careful of heat. When painting, ensure not to smoke or keep harsh paint materials close to heat or anything, to prevent fire hazards. If you are going to use anything inflammable, always place a fire extinguisher standing by.
Keep Rags or Paper Underneath
Drops of paint can make you slip and fall. Before you begin painting, make sure you have a rag or foam to clean the drips from the paint.
Also…
- Try to adhere to the paint manufacturer’s instructions, as they are another vital tip for safety.
- Keep away tools and equipment from the reach of children.
Conclusion
The above steps on how to paint high places without a ladder are important to those with a phobia of ladders. Always read the manufacturer’s instructions provided on any material or equipment before painting.
Now that we have shared how to paint your high places, you can go ahead with the painting challenge. So get your tools ready, and paint your home like a top professional.